One of the needs we often encounter is populating our database with some initial script. For that reason, we will show how to perform initial loading in Spring Boot when starting the application.
Although there are tools like Flyway to maintain a history and perform initial data loading, in this post, we will focus on the facilities provided by Spring Boot to create an initial load of SQL data and table creation in a database. For this, we will rely on Spring Data to establish connections with our database, enabling the persistence and automatic creation of tables.
Furthermore, if we want to remove automation and manually load data and create tables, we will explore how to use two types of files: data.sql and schema.sql.
Usage of schema.sql
Even when working with Spring Data allows us to delegate the creation of our tables through the @Entity annotation, if we want to avoid that automation, we can use a file called schema.sql. This file should be placed inside the resources folder and will be loaded when the application starts.
In the case of using this option, the automatic creation of tables needs to be disabled in our properties file:
spring.jpa.hibernate.ddl-auto=none
CREATE TABLE car (
    id   INTEGER      NOT NULL AUTO_INCREMENT,
    brand VARCHAR(128) NOT NULL,
    model VARCHAR(128) NOT NULL,
    color VARCHAR(128),
    PRIMARY KEY (id)
);
Using data.sql for Initial Loading in Spring Boot
Once the table has been created, we will need to load data into our database. To do this, we will use data.sql. This file should be inside the resources folder.
INSERT INTO car VALUES (1,'Ford', 'yellow', 'Mustang');
Creation of the database with Hibernate
Spring, through its properties and the Spring Data dependency:
        <dependency>
            <groupId>org.springframework.boot</groupId>
            <artifactId>spring-boot-starter-data-jpa</artifactId>
        </dependency>
Spring, through its properties and the Spring Data dependency, will provide a property that Hibernate will use for DDL generation, which is spring.jpa.hibernate.ddl-auto.
This property can have five values:
create– With this property, Hibernate will first drop and then create new tables.update– In this case, Hibernate will never delete tables or columns; it will only update the schema if there are any changes.create-drop– In tests, developers typically use this option to initially create the database and then drop it upon completing all operations.validate– This option validates the existence of tables and columns; if they do not exist, it throws an exception.none– With this option, DDL generation is deactivated. For example, if you want to manually create tables.
Spring Boot will choose a default value based on whether the database is embedded with create-drop or none if it’s not.
@Sql annotation
When creating our tests, we will have a set of test data that we will want to load or create tables for. In such cases, we will use @Sql. This annotation can be used at the class or method level.
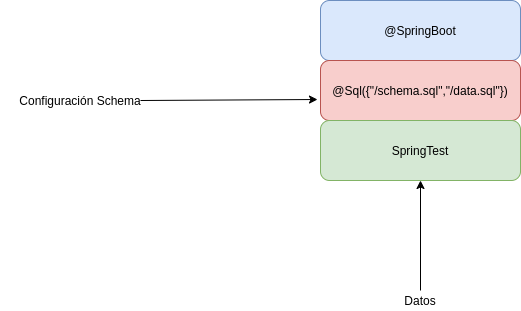
@SpringBootTest
@Sql({"/schema_test.sql","/test_cars.sql"})
public class CarServiceIntegrationTest {

    @Autowired
    private CarRepository carRepository;

    @Test
    public void testFindAll() {
        assertEquals(1, carRepository.findAll().size());
    }
}
There are different attributes that we can use with the @Sql annotation, which will make our work easier, especially in the testing part:
config– local configuration for scripts. This attribute will be accompanied by its own annotation@SqlConfig, indicating whether to apply the configuration locally.executionPhase– set when to execute the scripts, before or after the method:BEFORE_TEST_METHODorAFTER_TEST_METHOD.statements– this attribute allows us to execute SQL statements.scripts– the path of the SQL script.
Or, as we have indicated, we can set it at the method or class level.
    @Test
    @Sql({"/schema_test.sql","/test_cars.sql"})
    public void testFindAll() {
        assertEquals(1, carRepository.findAll().size());
    }
As we have seen, one of the attributes that we can apply to our @Sql annotation is config, which will help us with our local configuration. Let’s see it with an example.
@Test
@Sql(scripts = {"/test_cars.sql"},
  config = @SqlConfig(encoding = "utf-8", transactionMode = TransactionMode.ISOLATED))
public void testLoadDataForTestCase() {
    assertEquals(1, carRepository.findAll().size());
}
As we can see in the previous example, @SqlConfig will help us establish a series of properties for that specific test, such as encoding and transaction mode.
Conclusion
In this article on Initial Loading in Spring Boot, we have seen different ways to load data initially using the schema.sql and data.sql files and the @Sql annotation.
There are much more advanced and efficient tools for this type of data loading, such as Flyway.
If you want to take a look at the code and a working test, you can check it out on our GitHub.