
A significant part of my day used to be spent creating different Kubernetes objects like deployments, config maps, secrets, services, etc. This is a somewhat tedious and sometimes repetitive task where mistakes can easily occur. It is in situations like these that we should make use of and create a Helm Chart for Kubernetes. Helm Charts help us coordinate the download, installation, and deployment of our applications. In the following points, we will go through the necessary steps to understand how to create a Helm Chart for Kubernetes.
Why should one use Helm?
About why we should use Helm, the answer is quite simple: for simplicity and because it will make our work much easier. Helm manages deployments in Kubernetes through templates. It provides a flexible structure so that we can run any type of application in our Kubernetes cluster. It even allows versioning of our templates, enabling us to have different deployments in a simple and effective manner.
In the world of development and infrastructure, the goal is to avoid manual tasks whenever possible, as they can lead to errors. That’s why, by applying Helm charts, we can eliminate errors and deploy in a simple and secure way.
Hands on
In this example, we will create a Helm example with Minikube. Click here to install Minikube and here to configure and install Helm.
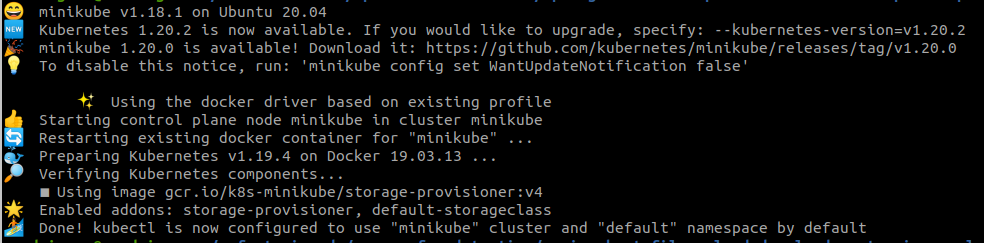
If everything is installed and configured, let’s start by launching our Minikube.
minikube start
And next, we are going to initialize the creation of a new Helm chart named chartexample:
helm create chartexample
Once created, we can verify the files and folders:
$ ls chartexample
charts  Chart.yaml  templates  values.yaml
Helm Chart Structure
Once we have created our Helm chart with the previous command, we will see two files and two folders. Let’s go through each one.
If we open Chart.yaml, we will see the following:
apiVersion: v2
name: chartexample
description: A Helm chart for Kubernetes

# A chart can be either an 'application' or a 'library' chart.
#
# Application charts are a collection of templates that can be packaged into versioned archives
# to be deployed.
#
# Library charts provide useful utilities or functions for the chart developer. They're included as
# a dependency of application charts to inject those utilities and functions into the rendering
# pipeline. Library charts do not define any templates and therefore cannot be deployed.
type: application

# This is the chart version. This version number should be incremented each time you make changes
# to the chart and its templates, including the app version.
# Versions are expected to follow Semantic Versioning (https://semver.org/)
version: 0.1.0

# This is the version number of the application being deployed. This version number should be
# incremented each time you make changes to the application. Versions are not expected to
# follow Semantic Versioning. They should reflect the version the application is using.
# It is recommended to use it with quotes.
appVersion: "1.16.0"
In the file, we see a series of attributes, starting with the API version, the chart name, and a description. Next, we see the type of chart, which is application by default, and the chart and application versions.
Now, let’s move to the /templates folder, which could be said to be where all the logic resides to deploy our application. It contains files for Kubernetes objects; if you take a look, you’ll find a deployment, ingress, a service, a service account, a horizontal pod autoscaler, and a tests folder.
If we continue exploring, we will find an empty folder named charts. This folder will be useful for adding charts that are necessary or that our application depends on.
Next, let’s analyze where the logic and configuration reside to generate a template—the values.yaml file.
Analyze values.yaml File in Helm Chart
The values.yaml file provides a template format where we can configure our Kubernetes objects.
# Default values for chartexample.
# This is a YAML-formatted file.
# Declare variables to be passed into your templates.

replicaCount: 1

image:
  repository: nginx
  pullPolicy: IfNotPresent
  # Overrides the image tag whose default is the chart appVersion.
  tag: ""

imagePullSecrets: []
nameOverride: ""
fullnameOverride: ""

serviceAccount:
  # Specifies whether a service account should be created
  create: true
  # Annotations to add to the service account
  annotations: {}
  # The name of the service account to use.
  # If not set and create is true, a name is generated using the fullname template
  name: ""

podAnnotations: {}

podSecurityContext: {}
  # fsGroup: 2000

securityContext: {}
  # capabilities:
  #   drop:
  #   - ALL
  # readOnlyRootFilesystem: true
  # runAsNonRoot: true
  # runAsUser: 1000

service:
  type: ClusterIP
  port: 80

ingress:
  enabled: false
  className: ""
  annotations: {}
    # kubernetes.io/ingress.class: nginx
    # kubernetes.io/tls-acme: "true"
  hosts:
    - host: chart-example.local
      paths:
        - path: /
          pathType: ImplementationSpecific
  tls: []
  #  - secretName: chart-example-tls
  #    hosts:
  #      - chart-example.local

resources: {}
  # We usually recommend not to specify default resources and to leave this as a conscious
  # choice for the user. This also increases chances charts run on environments with little
  # resources, such as Minikube. If you do want to specify resources, uncomment the following
  # lines, adjust them as necessary, and remove the curly braces after 'resources:'.
  # limits:
  #   cpu: 100m
  #   memory: 128Mi
  # requests:
  #   cpu: 100m
  #   memory: 128Mi

autoscaling:
  enabled: false
  minReplicas: 1
  maxReplicas: 100
  targetCPUUtilizationPercentage: 80
  # targetMemoryUtilizationPercentage: 80

nodeSelector: {}

tolerations: []

affinity: {}
In the above configuration file, we can see that it is structured to add a service, an ingress, autoscaling, affinity, etc. Let’s analyze and define each part of our values.yaml file.
Pod configuration
The first part of our values file contains information related to Pod configuration.
The first parameter we encounter is replicaCount, which indicates the number of replicas for the pod; by default, it sets it to 1.
Next, we have the image definition, where it defaults to the nginx image and the pullPolicy is set to IfNotPresent, which we will change to always for our example.
Secrets
Next, we have imagePullSecrets; in this section, any password or tokens can be defined.
Names
The next section we encounter is related to nameOverride and fullnameOverride. In this section, we can change the name of the chart that we created with the helm create command.
Service Account
By default, it will generate a service account based on the full name we have defined. The best and most recommended practice is to generate your own and define the desired permissions.
Security
In the securityContext and podSecurityContext section, limits on users or which file groups can be used or not will be defined.
Network
The next part we will look at is service and ingress. Regarding the service, we can define ClusterIP or NodePort. We will use NodePort in our example, as it will expose the service on each Kubernetes node’s IP address with a fixed port.
As for the ingress, we will leave it as false by default.
Resource
In the resources section, we will define the resource limits to be used. By default, it is empty, but it is advisable to fill it in. In our example, we will define 100m of CPU and 128Mi of memory.
Autoscaling
The next parameter we encounter is autoscaling, which is disabled by default and, once enabled, will work based on certain parameters.
Tolerations, node selectors, and affinities
Next, we will see the last three sections, which are empty by default.
As we explained in a previous article, nodeSelector is used when assigning our application or pods to specific nodes in our Kubernetes cluster.
Tolerations and affinities will ensure that our pods are running on different nodes.
In our example, for simplicity, we will leave it with the default configuration.
Deploying with Helm
Next, we are going to deploy an nginx with the modifications we have indicated earlier:
# Default values for chartexample.
# This is a YAML-formatted file.
# Declare variables to be passed into your templates.

replicaCount: 1

image:
  repository: nginx
  pullPolicy: Always
  # Overrides the image tag whose default is the chart appVersion.
  tag: ""

imagePullSecrets: []
nameOverride: ""
fullnameOverride: ""

serviceAccount:
  # Specifies whether a service account should be created
  create: true
  # Annotations to add to the service account
  annotations: {}
  # The name of the service account to use.
  # If not set and create is true, a name is generated using the fullname template
  name: ""

podAnnotations: {}

podSecurityContext: {}
  # fsGroup: 2000

securityContext: {}
  # capabilities:
  #   drop:
  #   - ALL
  # readOnlyRootFilesystem: true
  # runAsNonRoot: true
  # runAsUser: 1000

service:
  type: NodePort
  port: 80

ingress:
  enabled: false
  className: ""
  annotations: {}
    # kubernetes.io/ingress.class: nginx
    # kubernetes.io/tls-acme: "true"
  hosts:
    - host: chart-example.local
      paths:
        - path: /
          pathType: ImplementationSpecific
  tls: []
  #  - secretName: chart-example-tls
  #    hosts:
  #      - chart-example.local

resources:
  # We usually recommend not to specify default resources and to leave this as a conscious
  # choice for the user. This also increases chances charts run on environments with little
  # resources, such as Minikube. If you do want to specify resources, uncomment the following
  # lines, adjust them as necessary, and remove the curly braces after 'resources:'.
  limits:
    cpu: 100m
    memory: 128Mi
  requests:
    cpu: 100m
    memory: 128Mi

autoscaling:
  enabled: false
  minReplicas: 1
  maxReplicas: 100
  targetCPUUtilizationPercentage: 80
  # targetMemoryUtilizationPercentage: 80

nodeSelector: {}

tolerations: []

affinity: {}
To perform an installation with Helm, we will use the following command:
helm install helm-example chartexample/ --values chartexample/values.yaml
and if everything goes well, it should display the following output:
NAME: helm-example
LAST DEPLOYED: Fri Jun 11 13:17:17 2021
NAMESPACE: default
STATUS: deployed
REVISION: 1
NOTES:
1. Get the application URL by running these commands:
  export NODE_PORT=$(kubectl get --namespace default -o jsonpath="{.spec.ports[0].nodePort}" services helm-example-chartexample)
  export NODE_IP=$(kubectl get nodes --namespace default -o jsonpath="{.items[0].status.addresses[0].address}")
  echo http://$NODE_IP:$NODE_PORT
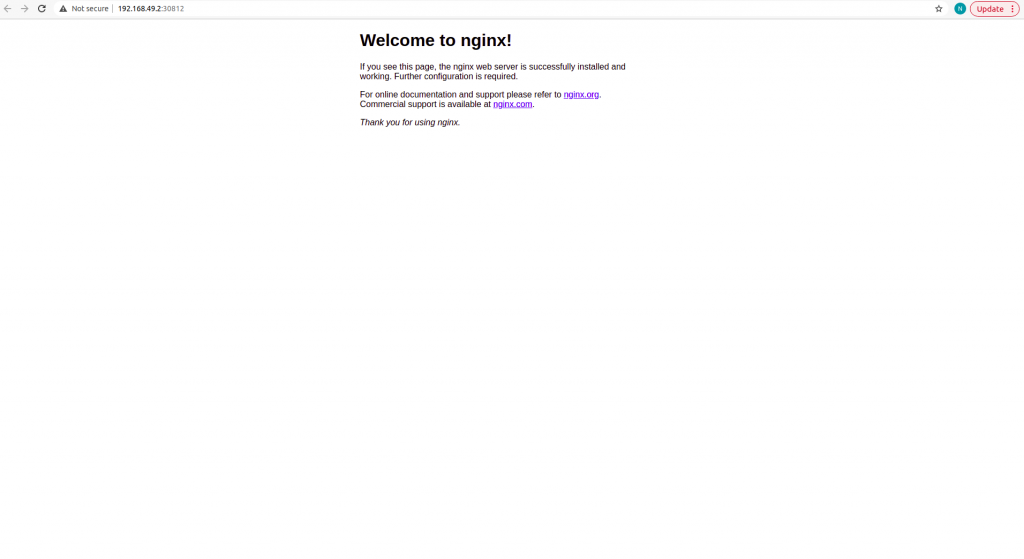
Once the above commands are executed, we should obtain the IP and the running port to view the nginx page:
Conclusion
Throughout this article on how to create a Helm Chart for Kubernetes, we have seen how we can deploy an application using Helm and its templates. This will assist us in repetitive tasks or when we need to deploy applications with similar characteristics.
Another example where we have used Helm is in autoscaling with Spring Boot and Prometheus.