In this new post, we will see how to integrate Keycloak with Spring Boot through an example. This type of integration is vital in microservices architecture, where you delegate authentication to a third party.
What is Keycloak?
As its website tells us, Keycloak is an Open Source Identity and Access Management.
Keycloak is written in Java and is compatible with SAML v2 and OpenID Connect (OIDC)/OAuth2 protocols. It is also supported by RedHat and is licensed under the Apache License.
The idea behind Keycloak is to ensure the protection of modern applications by facilitating integration with them.
Keycloak provides us with features such as SSO, centralization of different authentication methods, control over digital identities, and user control and management. It also allows us to focus on service development without having to focus on authentication.
Next, we will see how to integrate our Spring Boot application with Keycloak.
Starting and configuring Keycloak
The fastest way to start Keycloak is through its Docker image, so we will enter the following command:
docker run -p 8081:8080 -e KEYCLOAK_USER=admin -e KEYCLOAK_PASSWORD=password jboss/keycloak -Dkeycloak.profile.feature.docker=enabled -b 0.0.0.0
Once the image has been downloaded and started on port 8081 (or the one you prefer), we will go to the administration console using the following URL:
http://localhost:8081/auth/admin/master/console/
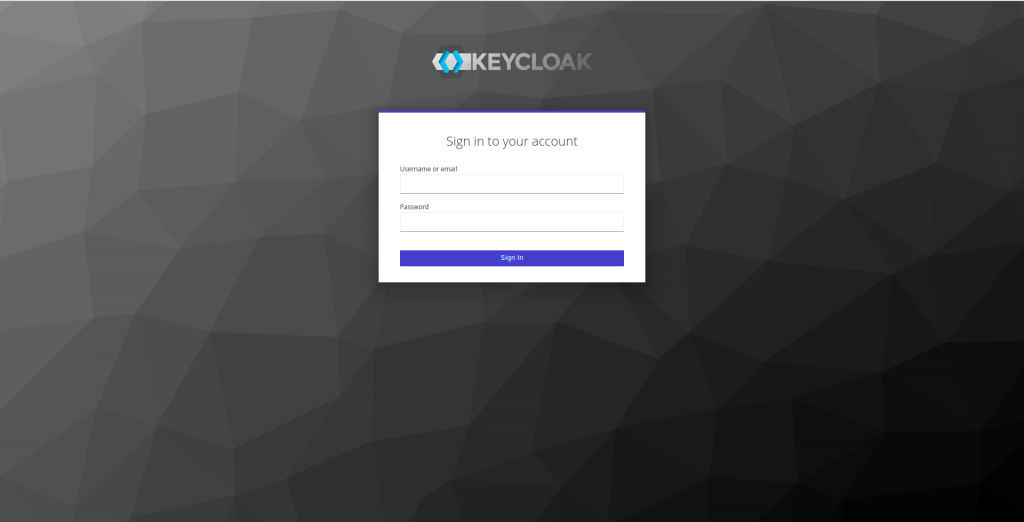
To access it, use admin and password as username and password.
In the Keycloak screen that we will see, we are going to log in with admin and the password password, which are the ones we used to start the Keycloak image.
Create a Realm
A Realm in Keycloak refers to an object that manages a set of users with their credentials, roles, and groups.
When we started Keycloak, we logged in with the default Master realm, so we are going to create our own.
After logging in, we are going to navigate to the top left and place the mouse over Master, above Realm Settings, and the Add realm button will appear:
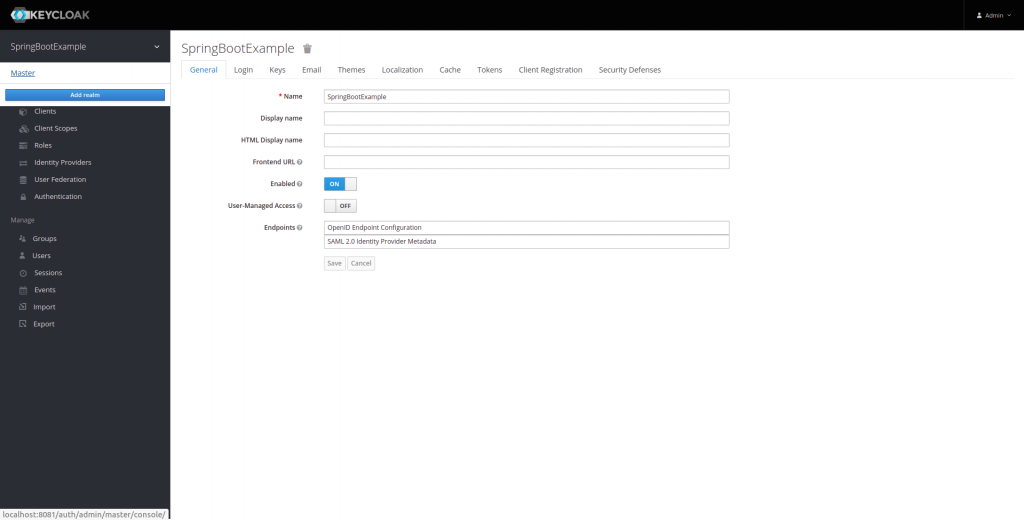
When we click on that button, the screen to add a new realm will appear, and we are going to create a new one called SpringBootExample.
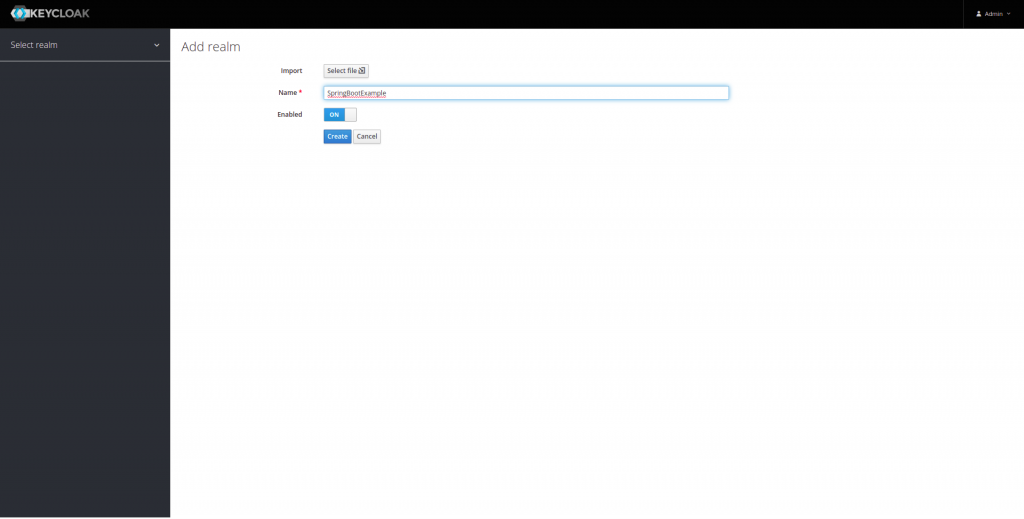
When we click create, a new realm will be created, and the next operations we are going to perform will be done on this realm.
Create a Client
Although Keycloak comes with some clients already created, we are going to create a new one, which we will call login. To do this, we are going to click on client and add client:
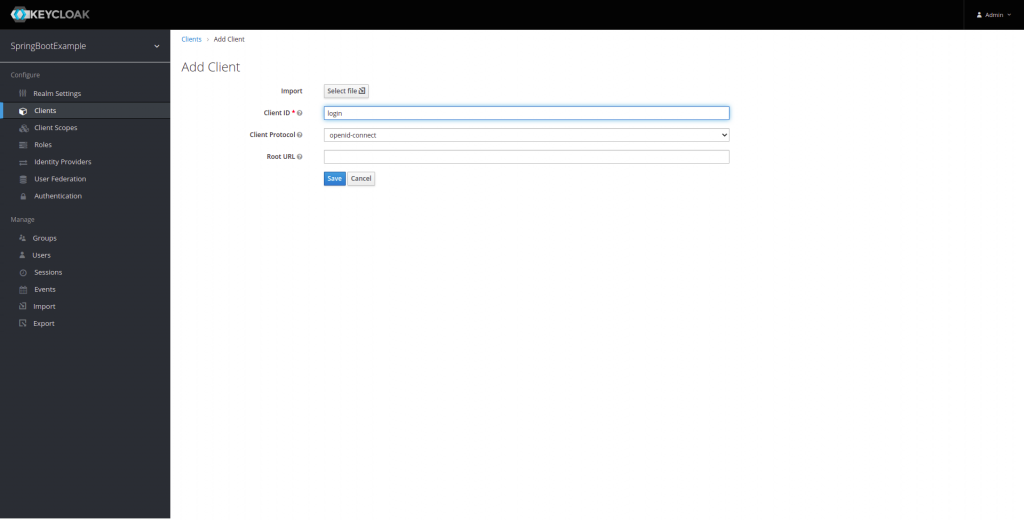
Our new client will be called login.
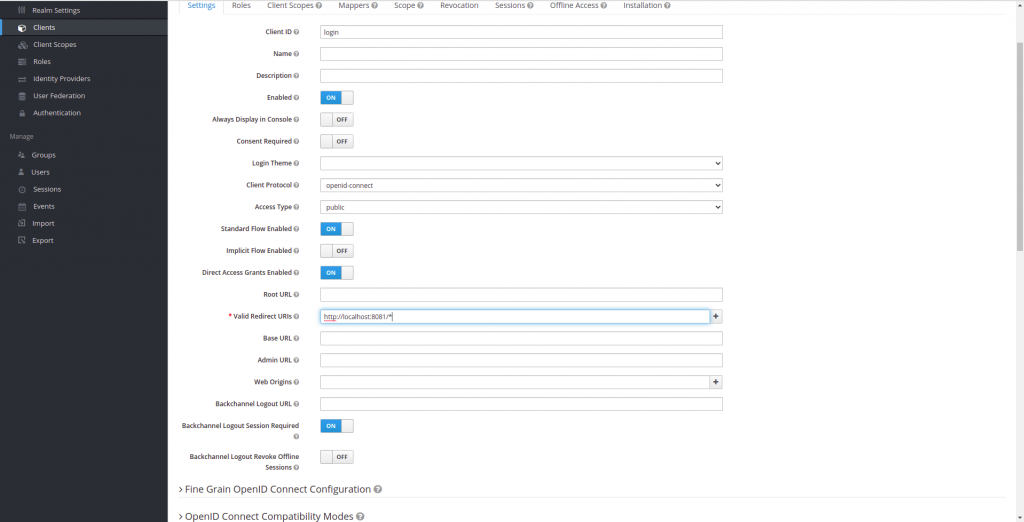
Once we have created the login, we will also set the redirect URL after login in our case, it will be our Spring Boot application, which will be located on port 8082.
Create a Role and User
The Keycloak system is based on a role-based access system per user. So, we are going to create a role and associate it with a user. To create a new role, we are going to click on role and add Role.
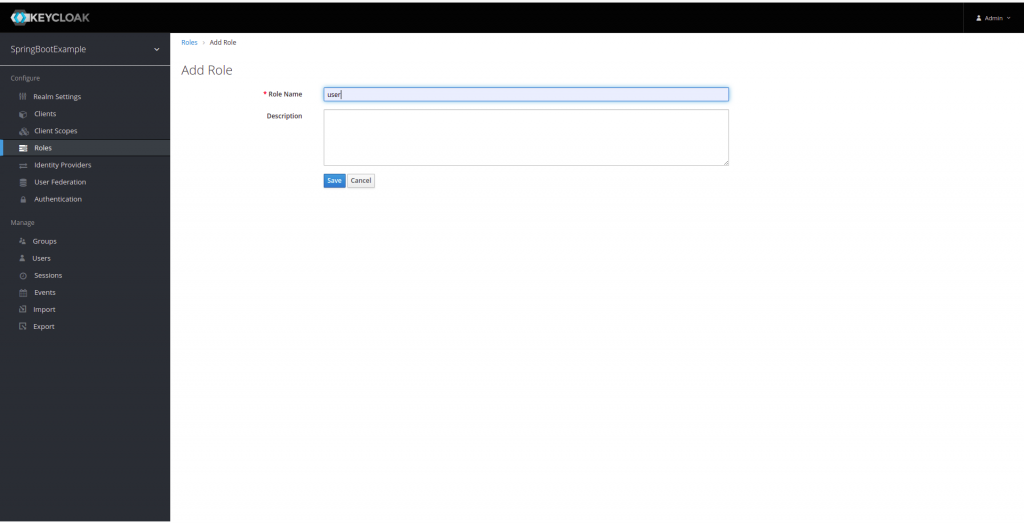

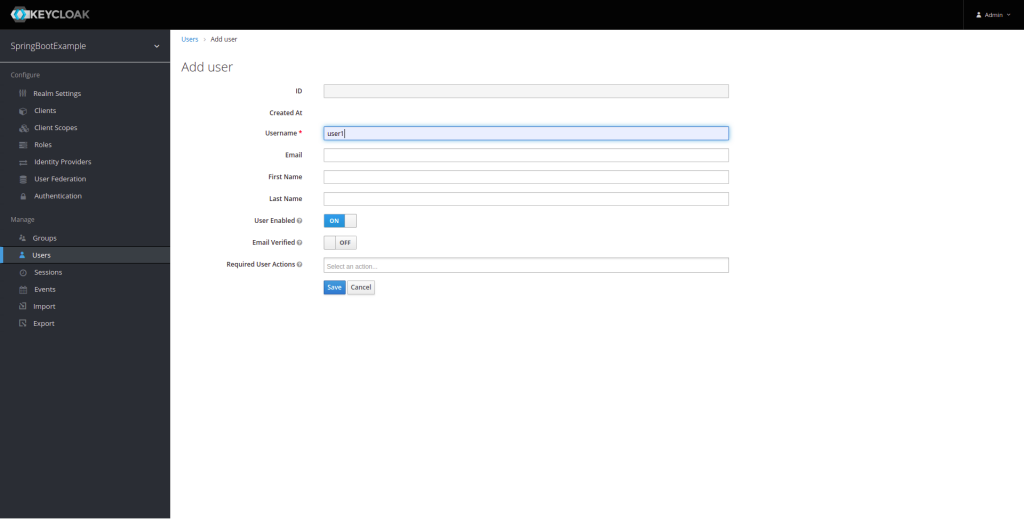
Next, we are going to create a user to whom we will associate the roles we have generated.
Next, we create the user’s password, which will be with the key 12345.
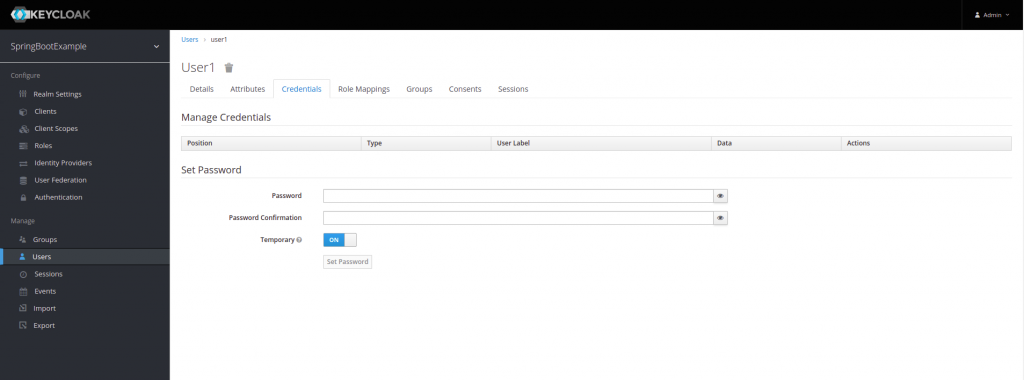
When creating the user’s password, we have the option to leave it Temporary, On, or Off, which means that the user will be required to change their password when they log in for the first time.
Next, we will associate the roles we have created, in this case, admin and user, to our user1.
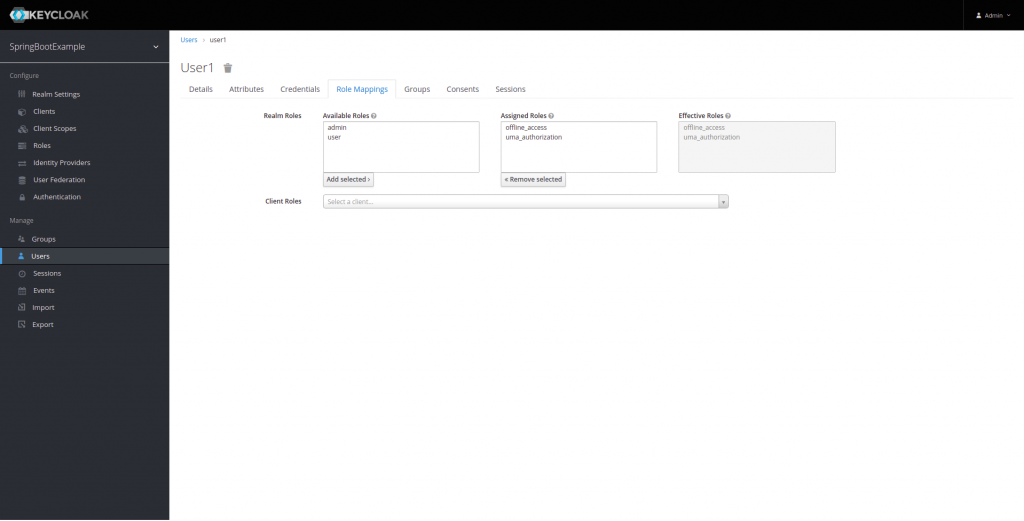
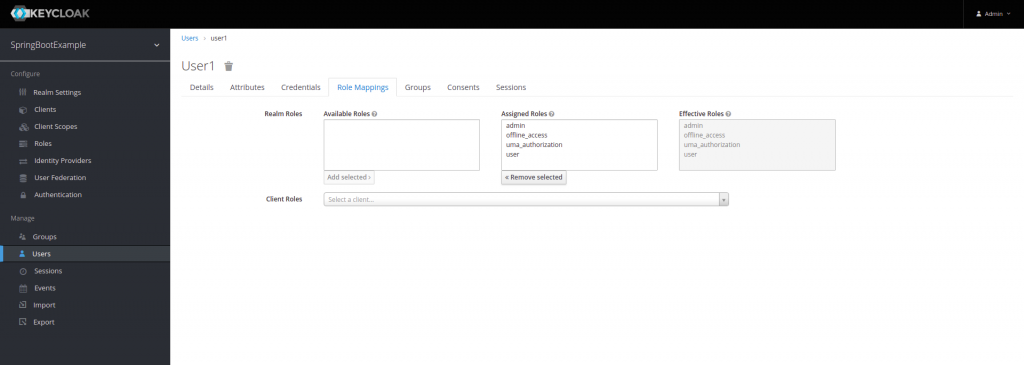
If we have followed all the steps, Keycloak has been configured to generate an authentication token..
Generate Access Token
Once we have completed the process of generating realm, clients, roles, and users, it is time to generate the token, which we will do by making a POST with an HTTP call:
'http://{IP}:{PORT}/auth/realms/{REALM_NAME}/protocol/openid-connect/token'
{
    'client_id': 'client',
    'username': 'username',
    'password': 'password',
    'grant_type': 'password'
}
To do this, we will make the following curl:
curl --example --request POST 'http://{IP}:{PORT}/auth/realms/{REALM_NAME}/protocol/openid-connect/token'
--header 'Content-Type: application/x-www-form-urlencoded' --data-urlencode 'grant_type=password'
--data-urlencode 'client_id=login' --data-urlencode 'username={user_name}'
--data-urlencode 'password={user_pwd}'
Next, we make a POST with our example:
curl --location --request POST 'http://localhost:8081/auth/realms/SpringBootExample/protocol/openid-connect/token' --header 'Content-Type: application/x-www-form-urlencoded' --data-urlencode 'grant_type=password' --data-urlencode 'client_id=login' --data-urlencode 'username=user1' --data-urlencode 'password=12345'
{
    'client_id': 'client',
    'username': 'your_username',
    'password': 'your_password',
    'grant_type': 'password'
}
If it is more convenient for you, you can use Postman to make the HTTPS call.
Once the request has been made, we will obtain an access_token and a refresh_token. If the token expires, we can make a call to the same URL with the refresh token in the request:
{
    'client_id': 'client_id',
    'refresh_token': refresh_token,
    'grant_type': 'refresh_token'
}
How to integrate Keycloak with Spring Boot with an example
Next, we will provide an example in which, through role-based access, we will allow a user to access an application.
Maven Configuration of Spring Boot with Keycloak
Keycloak provides us with a starter to take advantage of auto-configuration by adding it as a Maven dependency:
<dependency>
    <groupId>org.keycloak</groupId>
    <artifactId>keycloak-spring-boot-starter</artifactId>
</dependency>
And we also need to add the keycloak distributionManagement:
<dependencyManagement>
    <dependencies>
        <dependency>
            <groupId>org.keycloak.bom</groupId>
            <artifactId>keycloak-adapter-bom</artifactId>
            <version>12.0.1</version>
            <type>pom</type>
            <scope>import</scope>
        </dependency>
    </dependencies>
</dependencyManagement>
Security Configuration
The Keycloak dependency we added will provide us with a WebSecurityConfigurer through the KeycloakWebSecurityConfigurerAdapter class. However, this class is not essential since the auto-configuration it provides us with will be sufficient to establish authentication. Nonetheless, this class makes it easier for us to override some classes and provide authorization to our endpoints through roles.
@Configuration
@EnableWebSecurity
@EnableGlobalMethodSecurity( prePostEnabled = true,
        securedEnabled = true,
        jsr250Enabled = true)
public class KeycloakSecurityConfig extends KeycloakWebSecurityConfigurerAdapter {

    @Autowired
    public void configureGlobal(AuthenticationManagerBuilder auth) throws Exception {
        KeycloakAuthenticationProvider keycloakAuthenticationProvider = keycloakAuthenticationProvider();
        keycloakAuthenticationProvider.setGrantedAuthoritiesMapper(new SimpleAuthorityMapper());
        auth.authenticationProvider(keycloakAuthenticationProvider);
    }

    @Override
    protected void configure(HttpSecurity http) throws Exception {
        super.configure(http);
        http.authorizeRequests()
                .anyRequest()
                .permitAll();
        http.csrf().disable();
    }

    @Bean
    @Override
    protected SessionAuthenticationStrategy sessionAuthenticationStrategy() {
        return new RegisterSessionAuthenticationStrategy(new SessionRegistryImpl());
    }

    @Bean
    public KeycloakConfigResolver KeycloakConfigResolver() {
        return new KeycloakSpringBootConfigResolver();
    }
}
@EnableGlobalMethodSecurity: prePostEnable enables the pre and post annotations. The SecuredEnable annotation determines if the @Secured annotation will be active. Jsr250Enabled allows us to use the @RoleAllowed annotation.
KeycloakConfigResolver: To load the Spring Boot Adapter provided by Keycloak, we generate this bean.
ConfigureGlobal: It is responsible for registering the KeycloakAuthenticationProvider with the authentication manager.
Keycloak Configuration in Spring Boot
In order to connect with the Keycloak server that we have running, it is necessary to perform the following configuration in our application.properties or yml located in src/main/resources.
Next, we will define the essential configuration that is needed for our Spring Boot application to connect with Keycloak:
keycloak.auth-server-url=http://localhost:8081/auth
keycloak.realm=SpringBootExample
keycloak.resource=login
keycloak.public-client=true
Creating the Controller
Next, we will create the access controller for the application using role-based access control. With the exception of the /anonymous endpoint, which will not have role-based access control and will only require authentication:
@RestController
@RequestMapping("/api/v1/access")
public class UserController {

    @RequestMapping(value = "/anonymous", method = RequestMethod.GET)
    public ResponseEntity<String> getAnonymous() {
        return ResponseEntity.ok("Hello Anonymous");
    }

    @RolesAllowed("user")
    @GetMapping(value = "/user")
    public ResponseEntity<String> getUser(@RequestHeader String Authorization) {
        return ResponseEntity.ok("Hello User");
    }

    @RolesAllowed("admin")
    @RequestMapping(value = "/admin", method = RequestMethod.GET)
    public ResponseEntity<String> getAdmin(@RequestHeader String Authorization) {
        return ResponseEntity.ok("Hello Admin");
    }

    @RolesAllowed({ "admin", "user" })
    @RequestMapping(value = "/all-user", method = RequestMethod.GET)
    public ResponseEntity<String> getAllUser(@RequestHeader String Authorization) {
        return ResponseEntity.ok("Hello All User");
    }
}
Once we have finished the configuration, we can test our service by adding the generated token in the header as an HTTP Header:
--header 'Authorization: bearer <ACCESS_TOKEN>'
If the user has access (Roles Allowed), they can access the system, otherwise they will receive a 403 Forbidden error.
Let’s test with some curl commands, or you can use Postman if you prefer.
curl -X GET 'http://localhost:8082/api/v1/access/anonymous'
Output:
Authentication successful, Hello Anonymous
curl -X GET 'http://localhost:8082/api/v1/access/user' --header 'Authorization: bearer <Access-token>'
Output:
Role allowed, Hello User
Conclusion
In this post about How to integrate Keycloak with Spring Boot, we have seen how to perform authentication with Keycloak and role-based authorization through Spring Security.
Delegating authentication to an Identity Access Management system like Keycloak is vital when building a microservices-oriented architecture.
If you want to see the complete example, you can find it on our GitHub page by clicking here.
If you need more information, you can leave us a comment or send an email to refactorizando.web@gmail.com You can also contact us through our social media channels on Facebook or twitter and we will be happy to assist you!!
