
In a world where microservices-oriented architectures are becoming predominant, where different configurations per environment and adherence to the twelve-factor are necessary, the value of having an externalized configuration increases. Therefore, in this new article on refactoring, we bring an externalized configuration using Spring Cloud Config Server with Vault and Git.
Setting up Spring Cloud Config Server
Spring Cloud Config Server Configuration
The best way to start with Spring Cloud Config is to download the project from the Spring Initializr page. This option will download a project skeleton with all the necessary dependencies.
The downloaded pom.xml will have two dependencies that will be the only ones needed for our configuration:
<dependency>
			<groupId>org.springframework.cloud</groupId>
			<artifactId>spring-cloud-config-server</artifactId>
		</dependency>

		<dependency>
			<groupId>org.springframework.boot</groupId>
			<artifactId>spring-boot-starter-web</artifactId>
		</dependency>
With the project download, a class whose name ends in Application has been downloaded. This class, located in src/main/java/{package}/*Application, will be the entry point to our service. To use this service as a config server, you will also need to activate it with the annotation @EnableConfigServer.
This class should look as follows:
@SpringBootApplication
@EnableConfigServer
public class ConfigServerApplication {

	public static void main(String[] args) {
		SpringApplication.run(ConfigServerApplication.class, args);
	}

}
Once we have the main class, let’s move on to the service’s configuration files.
The downloaded project contains a file named application.properties within the resources folder (src/main/resources). For convenience, let’s rename it to yaml; it can also be called bootstrap.yaml.
In this file, we will configure the application name and leave the default entry port as 8080.
spring:
  application:
    name: config-server
Configuring Spring Cloud Config Server with Git
Spring Cloud Config Server allows us to externalize its configuration through a Git repository. This configuration should be placed in our *.yaml file. Besides the mandatory repository URL, it can include parameters such as the connection username and password.
In our case, we will have the following configuration. For now, we will omit any type of security:
  profiles:
    active: git
  cloud:
    config:
      server:
        git:
          uri: https://github.com/refactorizando-web/spring-cloud-config-server-git
When we access this URL, we can see that we have created a file called application.yaml with one property. We have defined this property as the externalized property, which will be stored in a Git repository instead of being within the application.
Let’s try to start the service and execute the following command:
curl -X “GET” “http://localhost:8080/configclient/default“
{
"name":"configclient",
"profiles":[
   "default"
  ],
"label":null,
"version":"6a0691af354e3191e87bf2140c1b731209f1f9a2",
"state":null,
"propertySources":[
{
    "name":"https://github.com/refactorizando-web/spring-cloud-config-
     server-git/application.yml",
    "source":{
          "properties.hello":"hola",
          "properties.bye":"adios"
       }
    }
  ]
}
{
"name":"configclient",
"profiles":[
"default"
],
"label":null,
"version":"6a0691af354e3191e87bf2140c1b731209f1f9a2",
"state":null,
"propertySources":[
   {
     "name":"https://github.com/refactorizando-web/spring-cloud-config-
      server-git/application.yml",
     "source":{
         "properties.hello":"hola",
         "properties.bye":"adios"
      }
   }
 ]
}
When executing the previous command, we can see how the properties have been saved in the Git configuration file.
Configuring Spring Cloud Config Server with Vault
What is Vault?
Vault is a HashiCorp platform that allows us to securely store secrets, configurations, passwords, etc. In other words, all sensitive data is in Vault.
Vault follows an encryption process using a master key that is not persisted anywhere. This key is divided into different shards, following the Shamir’s Secret Sharing algorithm.
Deploying Vault with Docker
To use Vault, we need to start it first. We can use a Vault image for that:
docker run -d -p 8200:8200 --name vault -e 'VAULT_DEV_ROOT_TOKEN_ID=myroot' -e 'VAULT_DEV_LISTEN_ADDRESS=0.0.0.0:8200' vault
Once Vault is running, the next step is to enter the Docker container and export the IP and token. The token will be what we defined as myroot.
docker exec -it my-vault /bin/sh#para entrar al contenedor
export VAULT_TOKEN="myroot" export
VAULT_ADDR="http://127.0.0.1:8200"
vault status
After exporting these variables and running vault status, we should see something like this:
Key Value
— —–
Seal Type shamir
Initialized true
Sealed false
Total Shares 1
Threshold 1
Version 1.5.4
Cluster Name vault-cluster-d16ea7ec
Cluster ID 77bab290-f64f-533a-67a8-be56e2acaf85
HA Enabled false
Adding properties to Vault
The next step is to add the properties we want to Vault. We have two methods to do this, through the command line or through its graphical interface:
Adding properties through commands:
If we run the following command without exiting Vault:
vault kv put secret/configclient client.property=hola
In this case, configclient will be the service that connects to the config server to retrieve the property.
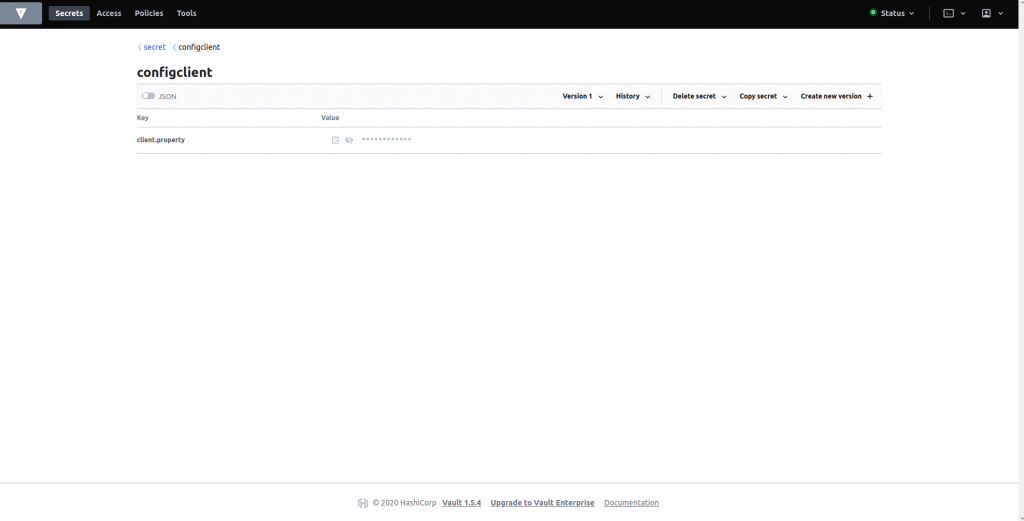
Adding properties through the interface:
If we access localhost:8200 from the browser, we will see the Vault interface. We need to provide the token (myroot). In the window that appears, we need to click on “secret” and create a new secret, which will be the name of the service that will be connected to the config server.
Configuring Spring Cloud Config Server with Vault
Once we have saved properties in Vault, it’s time to add the necessary configuration in the bootstrap.yml of the Spring config-server service.
To do this, we will add a new profile called “vault” and add two properties based on the desired execution order. In our case, we have set it to 1, so Vault will be executed before Git. We also see another property “KvVersion: 2”, which is related to the Vault version being used. Without this property, it will not work correctly. The complete yaml will look like this:
spring:
  application:
    name: config-server
  profiles:
    active: vault,git
  cloud:
    config:
      server:
        vault:
          kvVersion: 2
          order: 1
        git:
          uri: https://github.com/refactorizando-web/spring-cloud-config-server-git
          order: 2
If we now start the service and execute the same command as before, we need to add the Vault token to it. So it would be:
curl -X “GET” “http://localhost:8080/configclient/default” -H “X-Config-Token: myroot”
{
"name":"configclient",
"profiles":[
"default"
],
"label":null,
"version":null,
"state":null,
"propertySources":[
  {
     "name":"vault:configclient",
     "source":{
     "client.property":"hola"
  }
},
{
"name":"vault:application",
"source":{
     "baz":"bam",
     "foo":"bar"
    }
 },
 {
   "name":
       "https://github.com/refactorizando-web/spring-cloud-config-server-
          it/application.yml


.......
We can see the properties created in Vault, and the Git part has been omitted.
Now, we just need to use a Spring Cloud client to see how everything works well. So, let’s do a small example.
Configuring Spring Cloud Client
Configuration of Spring Cloud Service
To connect to a config server and consume the properties, the first step is to add the necessary dependency in our Spring Cloud application:
		<dependency>
			<groupId>org.springframework.cloud</groupId>
			<artifactId>spring-cloud-starter-config</artifactId>
		</dependency>
The next step is to add the endpoint of our config server and the Vault token in our bootstrap.yml file:
spring:
  application:
    name: configclient
  cloud:
    config:
      token: myroot
      uri: http://localhost:8080
server.port: 8888
In the previous file, we have used the same name for the service as we had saved the properties in Vault, and we have changed the port since the default port 8080 is used by the config server.
To conclude, let’s add a controller in the main class that consumes the property from Vault and Git:
@RestController
@SpringBootApplication
public class ClientApplication {

	public static void main(String[] args) {
		SpringApplication.run(ClientApplication.class, args);
	}


	@Value("${properties.hello}")
	private String gitProperty;

	@Value("${client.property}")
	private String vaultProperty;

	@GetMapping("/property")
	public ResponseEntity<String> getProperty() {
		return ResponseEntity.ok(gitProperty + " " + vaultProperty);
	}
}
Conclusion
In this article, we have explored how to externalize our properties using Vault and Git through a Spring Cloud Config Server. The importance of a property externalization system increases when our project consists of multiple services or microservices in different environments. It helps and facilitates the task of managing configurations across different services.
If you want to dive straight into it, you can download the project by clicking here on our GitHub.